Modified from Alex Guilloux's Fall 2002 document
CREATING TABLES WITH ORACLE 9i
For this homework, you will be asked to create the CAPTAIN database. For more information about this database schema, please refer to page 31-34 in the book. The homework is divided into 6 parts:
How to login into Oracle Enterprise Manager Console
How to create a User
How to create a Table
How to create an Index
Create table ITEM
How to export a database
PART 1: HOW TO LOGIN INTO ORACLE ENTERPRISE MANAGER CONSOLE
Step 1:
Launch the Enterprise manager console. Click on “Start”, “Programs”, “Oracle Home”, “Enterprise Manager Console”. Note that “Oracle Home” label may have a different name, such as “Oracle OraHome” depending on the setup.
Step 2:
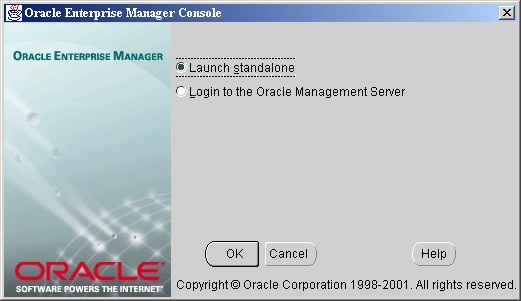
When the program comes up (it can take a while), make sure to select “Launch standalone” and then click “OK”
Step 3:
Once you got into the Oracle Enterprise Manager Console, double-click on "Network", "Databases", "ORCL". Note that "ORCL" may be any database default that you may have installed.
As you double click on "ORCL", a new window will popup to connect to the database. Use the username "system" and password "manager" (or whatever password you set during installation). Connect as "Normal" and make sure to check "Save As Local Preferred Credentials" so that you do not have to login every time. Press "OK" when ready.

A new window will ask whether to continue. Select "OK".

Step 4:
When connected, you will see information about the database.

PART 2: HOW TO CREATE A USER
Step 1:
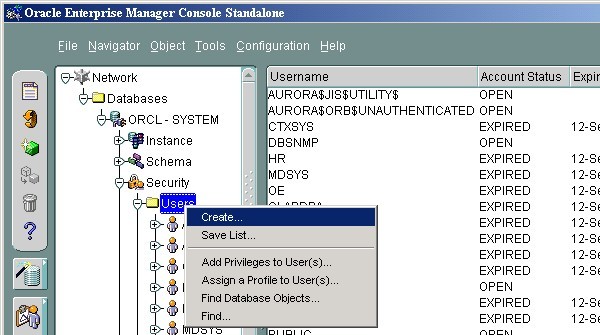
Double-click on "Security" then "Users". Right click on Users and a submenu shows up. Click on "Create".
Step 2:
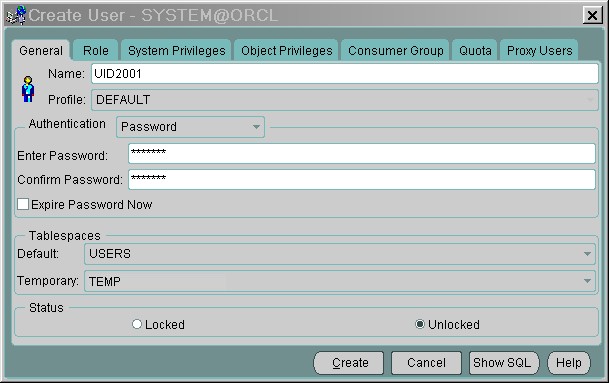
Fill out the General Tab: In the name textbox, type your username. This can be UIDnnnn where nnnn is the last four digit of your social security number. It can be your uhunix ID. It can be something else. Just make sure that is relatively short, is unique in the class, and easily identifies you. For profile, just leave it as "Default".
The authentication method should be "Password". For the password, type in your username again. Do NOT check "Expire Password Now".
In the tablespaces section, select "Users" for the Default and "Temp" for temporary. Finally, for the status, select "Unlocked".
Step 3:
Click the Role tab and the list of available roles appears, as shown below. The first listbox shows all the roles available; and the bottom listbox shows the granted roles for that user. "Connect" has already been assigned automatically (default for all users). You need to add "Resource" and "DBA". Double click on the "Resource" and the "DBA" on the "available" listbox, and make sure they appear in the bottom listbox.
"Connect" allows the user to logging into the database.
"Resource" allows the user to create tables.
"DBA" gives DataBase Administrator rights.

This user account can be the repository for all your future tables.
PART 3: HOW TO CREATE A TABLE
Step 1:
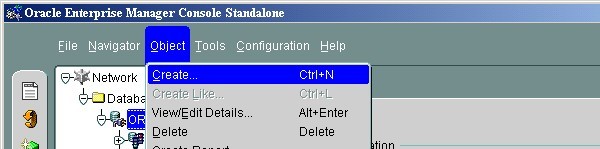
Now that you have created an account, you will start adding tables. The
first table will be the CAPTAIN table, as described in chapter 2. Select
"Object", then "Create".
Step 2:
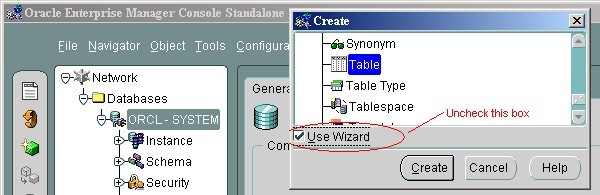
A new windows pops up. This window allows you to create all possible objects for the database. For now, select "Table" and uncheck the "Use Wizard". Then click on "Create".
Step 3:
You'll see the following screen. As the table name, type "CAPTAIN". Schema is the table owner. For your schema, select your username, which you created in PART 2. Leave the tablespace as the default and the "Define Columns" option selected.
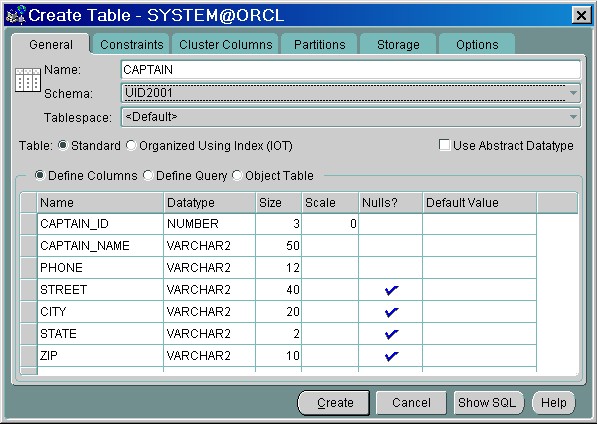
Name is the field name of the table. For each field, you need to define the data type, its size, scale (if needed), whether to allow nulls and its default value. For example, enter the first row as follow: the name should be CAPTAIN_ID and its data type is Number. A size of 3 means that the number can range up to 3 digits (0 to 999). The scale is the number of digits after the decimal point. Since the CAPTAIN_ID will be a primary key, you should not allow nulls. Repeat the same method for the other fields.
Also note that to enforce the business rule "In order to check out any equipment, a captain must have a local phone number", the phone number can be either enforced by the DBMS or by a stored procedure (see page 32). In this case, let's assume that the captain table is used ONLY to store valid captains who filled out the registration form completely, rather than storing all captains (who may not have a phone number). In this case, the DBMS can "enforce" the business rule by not allowing the phone number to be null. But remember, rather than making ASSUMPTIONS, you should ask the user first. In this example, we'll make the assumption to give you an example of how the DBMS could enforce business rules.
Step 4:
Next, select the "Constraints" tab. As soon as you click on the first row, the following comes up.

Type in "CAPTAIN_ID_PK" in the Name and select "PRIMARY" as the Type. In the Constraint Definition, select "CAPTAIN_ID" as the field to index on. NOTE: CAPTAIN_ID_PK is the primary key INDEX. It is not the primary key. It just tells Oracle that CAPTAIN_ID should be treated as the primary key.

Step 5:
Finally, click on "Create" and you should have a confirmation box that you have created the table successfully.

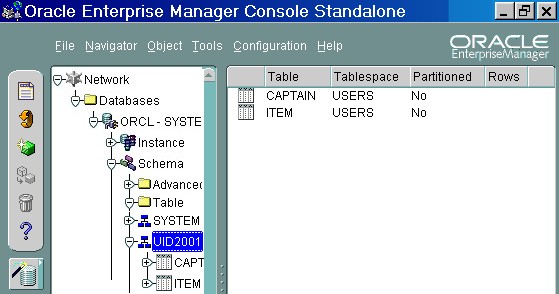
You can verify that the table has been created by going to "Schema", "Table", "UIDnnnn".
Step 6:
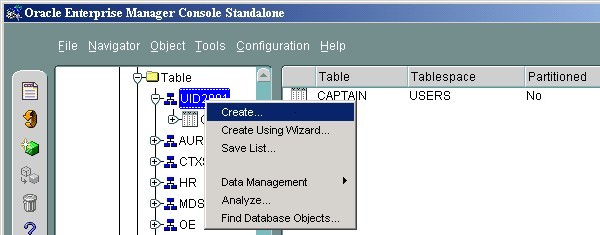
Another way of creating the table is to right click on the "Table" and select "Create" as follow:
PART 4: HOW TO CREATE AN INDEX
Step 1:
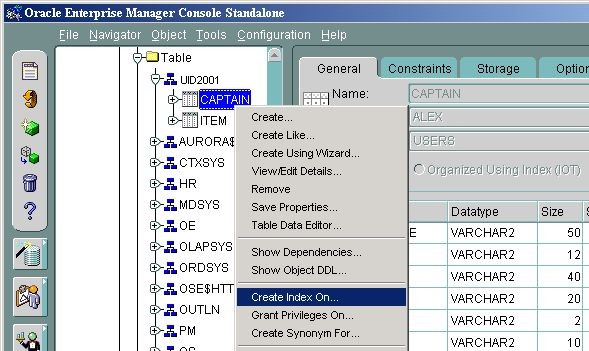
In this section, you will create an index on the CAPTAIN_ZIP_X code field. Right click on the CAPTAIN table to bring a popup menu. Then select "Create Index On".
Step 2:
In the new window, type "CAPTAIN_ZIP_X" in the name textbox. Verify that the schema is the username you created and the tablespace is "Default". In the "Index on" option, select "Table". Click in the "Order" column for the "ZIP" to see a "1". NOTE: You cannot index on a field that is already indexed, such as CAPTAIN_ID.

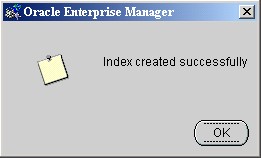
Click on "Create" when done. A confirmation box will tell you if you created the index successfully.
PART 5: CREATE TABLE ITEM
Using either method of creating the "Table", you need to create the ITEM table. Please pay attention to the data types and the size of the field. Also create the primary key and an index on one of the fields.
PART 6: HOW TO EXPORT A DATABASE
In this section, you will learn how to export your database. Go to the DOS prompt and type "EXP". The system will ask you for your username and password. Enter your username and your password.
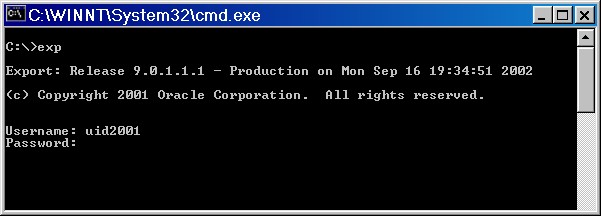
You should see a welcome screen from Oracle9i if you are successfully connected. If not, you can try to login as "system" and password "manager".
At the prompt "Export File:", type in "c:\UIDnnnn.dmp" (where UIDnnnn is your username) so that the exported file will be at root of your C: drive.

Next, the prompt will ask you "(1) E(ntire database), (2) U(sers), or (3) T(ables):", type in "2" then return.
At "Export grants (yes/no): yes >", just press return. It will use the default value, which is "yes".
At "Export table data (yes/no): yes >", you can type "yes" or just press return.
At "Compress extents (yes/no): yes >", you can just press return.

The system should respond with "Export done in ...". Finally, it will ask you which user to export. Just type in your username. It will ask you again to enter the username--just press return.

At the second return, Oracle should process your export request as follow:
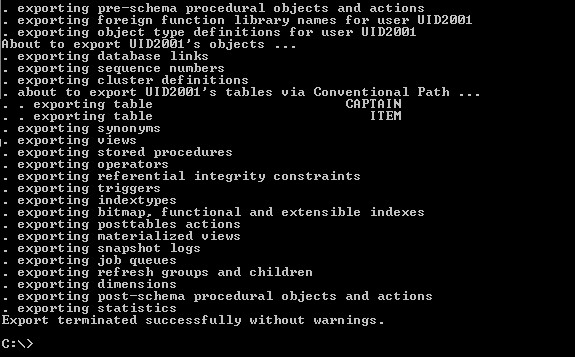
When done, you will be taken automatically to the DOS prompt.